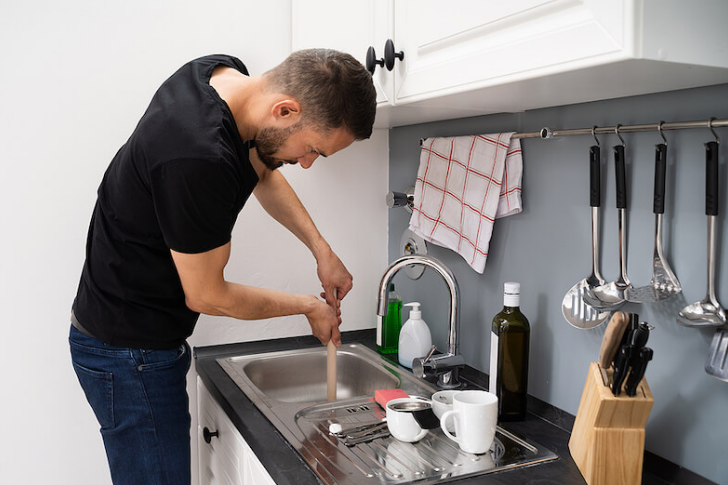
A clogged drain can be a household nightmare. Here's a guide to safely and effectively use a plunger to clear it.

Clogged drains are a common household issue that can disrupt daily activities. Fortunately, using a plunger is an effective and straightforward method to clear minor clogs. This guide will walk you through the steps to efficiently unclog a drain with a plunger while ensuring your safety throughout the process.
Tools and Materials Needed
- Plunger: A cup plunger is best for sinks and tubs, while a flange plunger is ideal for toilets.
- Rubber Gloves: To protect your hands from germs and chemicals.
- Old Towels or Rags: To clean up any spills or messes.
- Bucket: To catch any excess water or debris.
- Safety Goggles: Optional, but recommended to protect your eyes from splashes.
Steps to Unclog a Drain with a Plunger
1. Assess the Situation
- Identify the Clog: Determine which drain is clogged (sink, tub, toilet) and the severity of the clog. If water is standing still, it indicates a blockage.
- Check for Other Issues: Ensure that other drains in the house are not affected, as this could indicate a more significant plumbing issue.
2. Prepare the Area
- Clear the Surroundings: Remove any items around the drain area to prevent damage or contamination.
- Protect the Floor: Place old towels or rags around the drain to catch any spills.
3. Fill the Sink or Tub
- Add Water: If you’re unclogging a sink or tub, fill it with enough water to cover the bottom of the plunger (about 1-2 inches). This helps create a better seal and suction.
4. Position the Plunger
- Choose the Right Plunger: Use a cup plunger for sinks and tubs, and a flange plunger for toilets.
- Create a Seal: Place the plunger over the drain opening, ensuring it covers the entire opening to create a tight seal.
5. Plunge Effectively
- Use Firm, Controlled Movements: Push down firmly and pull up quickly, creating suction. Repeat this motion for about 15-20 seconds.
- Maintain the Seal: Ensure that the plunger remains sealed against the drain during the process. If you lose the seal, lift the plunger and reposition it.
6. Check for Success
- Remove the Plunger: After plunging, remove the plunger and check if the water drains away. If it does, the clog is cleared.
- Repeat if Necessary: If the water doesn’t drain, reapply the plunger and repeat the plunging process for another 15-20 seconds.
7. Flush the Drain
- Run Hot Water: Once the clog is cleared, run hot water down the drain for a few minutes to help remove any remaining debris and ensure smooth drainage.
Safety Tips
- Wear Gloves: Always wear rubber gloves to protect your hands from germs and potential chemicals.
- Avoid Chemical Drain Cleaners: If you’ve used chemical drain cleaners previously, wait at least 30 minutes before plunging. Mixing chemicals can create harmful fumes.
- Be Cautious with Toilets: When plunging a toilet, ensure the water level is not too high to avoid spills. If necessary, use a bucket to remove excess water before plunging.
- Watch for Backflow: Be prepared for water or debris to come back up when you remove the plunger. Keep towels handy to clean up any mess.
When to Call a Professional
If you’ve tried plunging multiple times without success, or if you notice recurring clogs, it may be time to call a plumber. Persistent clogs can indicate deeper plumbing issues that require professional attention.
Conclusion
Unclogging a drain with a plunger is a simple and effective method that can save you time and money. By following these steps and safety precautions, you can efficiently clear minor clogs and restore proper drainage in your home. Remember, if the problem persists, don’t hesitate to seek professional help to avoid further complications.


