Rubber tiles are a versatile and durable flooring option for many spaces. This guide offers practical advice on their installation and tips to ensure longevity.
Rubber tiles are a popular choice for flooring due to their durability, versatility, and comfort. Whether you're installing them in a home gym, garage, playroom, or any other high-traffic area, rubber tiles offer excellent resilience, sound insulation, and shock absorption. This guide provides tips and advice on how to install rubber tiles to ensure a smooth, long-lasting installation.
Rubber tiles have become a preferred flooring option in many spaces for several reasons:
Before starting your installation, it's important to understand the different types of rubber tiles available:
Each type has its own advantages, but interlocking tiles are typically the easiest to install for DIYers.
Before you begin installing rubber tiles, gather the necessary tools and materials:
A clean and smooth subfloor is essential for a proper rubber tile installation. Follow these steps:
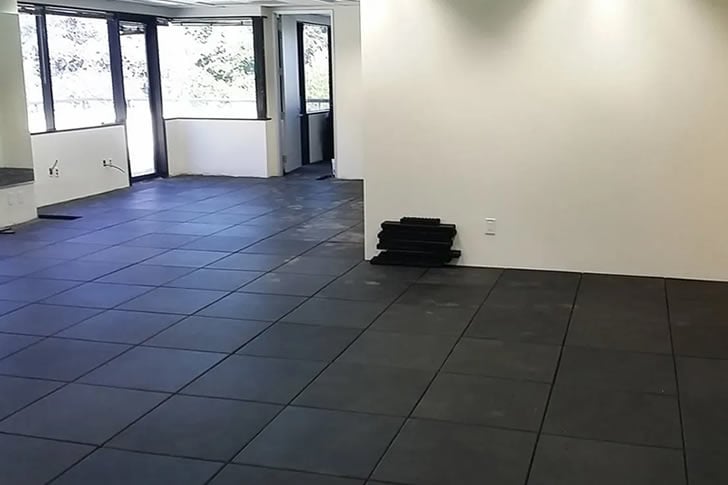
Carefully plan how you want your rubber tiles to be arranged. Start by choosing a corner of the room to begin installation. It's important to lay out the tiles in the desired pattern before permanently placing them. If you're using interlocking tiles, ensure that the edges are aligned neatly. For straight-edge tiles, determine where the tiles will need to be cut to fit along walls or corners.
For tiles that need to be cut to fit around walls, corners, or obstacles, use a utility knife to make precise cuts.
Once all tiles are in place, check that the edges are aligned and the joints are tightly fitted. Use a rubber mallet to tap any tiles that may have shifted during installation.
If adhesive was used, give the tiles time to cure before walking on them or moving furniture back into the room. Typically, this takes 24-48 hours, depending on the adhesive manufacturer's instructions.
Proper maintenance is essential to keep your rubber tiles in good condition:
Installing durable rubber tiles is an affordable and efficient way to enhance your space. By following the steps outlined in this guide, you can ensure a smooth installation process, creating a resilient and attractive floor that will last for years. Whether in a home gym, garage, or play area, rubber tiles are a great investment in both function and style.
Explore the Tranquil Bliss of Idyllic Rural Retreats

Ultimate Countdown: The 20 Very Legendary Gaming Consoles Ever!

Understanding Halpin and its Influence

Affordable Full Mouth Dental Implants Near You

Discovering Springdale Estates

Illinois Dentatrust: Comprehensive Overview

Embark on Effortless Adventures: Unveiling the Top in Adventures Made Easy Outdoor Equipment

Unveiling Ossur Valves: Innovation in Prosthetics

Unlock the Full Potential of Your RAM 1500: Master the Art of Efficient Towing!

Unlock the Full Potential of Your RAM 1500: Master the Art of Efficient Towing!
The RAM 1500 is well-regarded for its robust towing performance, making it an excellent pick for those with heavy-duty transport needs, such as towing trailers, boats, or considerable weights. Harnessing this power responsibly demands a thorough understanding and adept use of its towing features to guarantee both safety for the driver and cargo and to extend the vehicle's operational life. Here are five critical aspects to consider for tapping into the full towing potential of the RAM 1500.

Discover Affordable Prepaid Phones Today
Explore the top prepaid phones with no monthly fees and unbeatable offers on unsold smartphones.

How to Thrive on Dating Platforms for Asian Singles
Navigating the world of online dating for Asian singles can be exciting and fulfilling. Here's a guide to help you succeed and find your community.

Maximize Your Solar Investment: Expert Tips for Sustaining Peak Panel Performance
After purchasing solar panels, the journey towards a greener lifestyle and financial savings has just begun. The key to reaping the benefits of this investment is vigilant maintenance, ensuring the longevity and performance of your solar array. The forthcoming advice offers a road map for preserving the efficiency of your solar panels, securing an enduring impact on both your utility bills and the environment.

Discover the Surge in Trendy Prefab Homes: Smart, Streamlined Living Made Effortless!
In recent years, there has been a significant surge in the popularity of prefabricated homes, also known as prefab homes. These innovative dwellings are capturing the attention of homeowners and designers alike due to their smart, streamlined living concept that makes modern living effortless. Prefab homes are changing the way we think about construction, offering a fresh take on sustainable living, efficient design, and cost-effective housing solutions.

Transform Your Lifestyle: Discover the Elegance and Swift Convenience of Designer Prefabricated Homes!
The innovative prefab housing movement is reshaping the traditional construction industry, offering a novel take on how homes are built and styled. These modular residences, commonly known as prefab homes, are crafted in factories prior to being transported in segments that are designed for hassle-affordable delivery and swift assembly. This construction approach has gained popularity for its ability to slash expenditures, accelerate building timelines, and diminish its ecological footprint. Herein, we delve into the expanding domain of prefab residences and their role in transforming contemporary domiciliary norms.